
Every recipe on FoodNearMe is tested to be anti-inflammatory, satisfying, and actually delicious — real food, real results, no shortcuts.
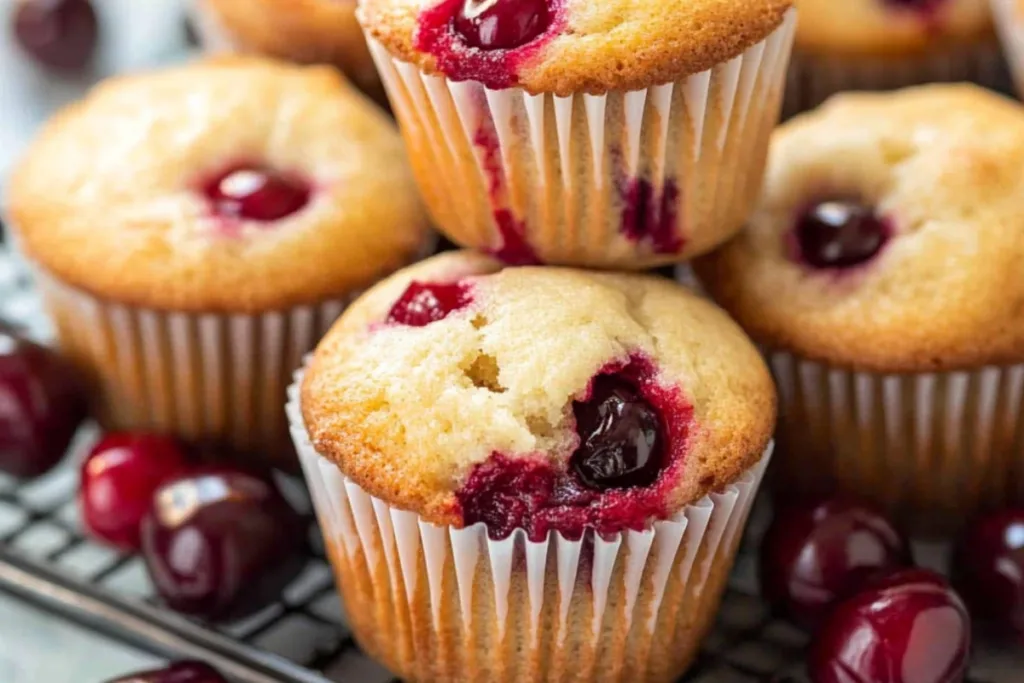
More about Joe →In the hustle of daily life, we often seek comfort in food that nourishes our bodies and souls. Cherry Muffins Delight bring a wholesome and flavorful twist to a timeless classic. Made with ingredients like all-purpose flour, sugar, and fresh cherries, these muffins not only taste delightful but also provide a satisfying, healthy treat. Whether for a sweet breakfast or a quick snack, these muffins are perfect for any moment when you crave something heartwarming.
Not long ago, I decided to try my hand at baking Cherry Muffins for the first time. To my surprise, they turned out to be not only delicious but also incredibly satisfying. The balance of sweet cherries and fluffy muffin texture left everyone asking for seconds! Feeling adventurous, I added a sprinkle of almond slivers on top for a delightful crunch. This dish promises to impress health-conscious foodies and anyone looking to savor a tasty, guilt-free indulgence.
Why we love this recipe Cherry Muffins:
These Cherry Muffins are soft and moist, making each bite a delight. Tart cherries add a burst of flavor that pairs perfectly with the light sweetness of the muffins. They’re quick to prepare, making them ideal for busy mornings or a sweet treat on the go. Plus, they can easily be customized with different toppings like nuts or chocolate chips, ensuring that every batch is a new experience!

Step-by-Step Cooking Instructions
Now that you’ve gathered your ingredients and tools for those delightful Cherry Muffins, it’s time to embark on a sweet baking adventure. These steps will guide you through transforming fresh cherries and simple pantry items into a batch of fluffy and flavorful muffins that will fill your kitchen with an irresistible aroma. Get ready for a fun and rewarding baking experience!Step 1: Preheat the Oven
Start by preheating your oven to 350°F (175°C). This essential step ensures your Cherry Muffins cook evenly and achieve that perfect golden-brown top. While waiting for the oven to reach the desired temperature, take a moment to enjoy the anticipation of the deliciousness to come!Step 2: Prepare the Muffin Tin
Line your muffin tin with paper liners or grease it lightly with butter or cooking spray. This preparation will prevent your Cherry Muffins from sticking and make for easy cleanup later. Plus, those cute muffin liners will give your treats a charming touch!Step 3: Mix the Dry Ingredients
In a large mixing bowl, whisk together the flour, baking powder, salt, and sugar. These dry ingredients are the backbone of your muffins. Mixing them well ensures an even distribution of flavors and helps your Cherry Muffins rise beautifully. Enjoy the sweet, earthy aroma of the flour as you sift it through your fingers!Step 4: Combine the Wet Ingredients
In another bowl, crack the eggs and whisk them until smooth. Then add the milk and melted butter. These ingredients bring moisture and richness to the batter. Stir until fully incorporated, and feel the excitement as the mixture transforms into a creamy blend!Step 5: Combine Wet and Dry Mixtures
Gently pour the wet mixture into the dry ingredients. Stir the batter just until the flour is moistened – be careful not to overmix! Some lumps are perfectly fine; this is what keeps your Cherry Muffins fluffy and tender. It’s amazing how a few simple ingredients come together to create something so delightful!Step 6: Fold in the Cherries
Now comes the star of the show! Gently fold in the chopped cherries, taking care to distribute them evenly throughout the batter. Their juicy sweetness will burst with every bite of your Cherry Muffins, bringing a pop of flavor that will have everyone reaching for seconds!Step 7: Fill the Muffin Cups
Spoon the batter into the prepared muffin cups, filling each about two-thirds full. This allows enough room for your muffins to rise without overflowing. You’re just moments away from enjoying your freshly baked Cherry Muffins, so take a moment to admire your handiwork!Step 8: Bake to Perfection
Slide the muffin tin into the preheated oven and let them bake for about 20-25 minutes. You’ll know they’re done when the tops are golden brown and a toothpick inserted in the center comes out clean. The aroma wafting through your kitchen is going to be irresistible!Step 9: Cool and Enjoy!
Once baked, carefully remove the muffin tin from the oven. Allow the muffins to cool in the tin for a few minutes before transferring them to a wire rack. This step is crucial for keeping them from becoming soggy. Enjoy the anticipation of tasting your creation as they cool!Detailed Directions and Instructions
Step 1: Preheat the Oven
Set your oven to 350°F (175°C). This gets it ready for baking, ensuring that your Cherry Muffins are cooked evenly when they go in.Step 2: Prepare the Muffin Tin
Prepare your muffin tin with liners or grease it lightly. This prevents sticking and makes it easy to pop out your delicious muffins later.Step 3: Mix the Dry Ingredients
Combine flour, baking powder, salt, and sugar in a large bowl. Whisk them together to create a well-mixed dry base, ensuring every bite will be perfectly balanced in taste.Step 4: Combine the Wet Ingredients
In another bowl, whisk eggs, milk, and melted butter until well combined. This mixture will add moisture and flavor to your muffins, setting a great foundation.Step 5: Combine Wet and Dry Mixtures
Gently pour the wet mixture into the dry ingredients, stirring lightly until just mixed. Overmixing can lead to dense muffins, so take care to keep it light!Step 6: Fold in the Cherries
Add in the chopped cherries and fold them into the batter. This is where you infuse your muffins with juicy sweetness, making each bite a delightful experience.Step 7: Fill the Muffin Cups
Spoon the mixed batter into the muffin cups, about two-thirds full to allow room for rising. Admire your colorful cherry-speckled batter!Step 8: Bake to Perfection
Place the muffin tin in the preheated oven and bake for 20-25 minutes. Watch for that golden top, and let the delicious smell fill your kitchen!Step 9: Cool and Enjoy!
Remove the muffins from the oven, allow them to cool slightly, and transfer them to a wire rack. Enjoy the satisfaction of your baking skills while they cool down.Notes
Tip on Storage
Store your delicious Cherry Muffins in an airtight container at room temperature for up to three days. They remain soft and tasty during this time, allowing you to indulge whenever you wish!Freezing Suggestions
If you want to save some for later, wrap the cooled muffins individually in plastic wrap and place them in a freezer bag. They can be frozen for up to three months. Just thaw them at room temperature when you’re ready to enjoy a muffin!Fresh Cherry Alternatives
Don’t have fresh cherries? No problem! You can substitute with frozen cherries—just make sure to thaw and drain them before folding them into the batter. Your Cherry Muffins will still be a hit!Why Choose Homemade Cherry Muffins?
Baking your own Cherry Muffins means you can tailor them to your taste. You have the freedom to adjust the sweetness, incorporate extras like nuts or spices, or even top them with a sprinkle of sugar for some added crunch. The joy of creating something from scratch makes each muffin a labor of love!Perfect Pairings for Your Cherry Muffins
Enjoy your freshly baked Cherry Muffins alongside a warm cup of coffee or tea. They also make a wonderful breakfast treat or a delightful afternoon snack. Try serving them with a smear of cream cheese or a dollop of butter for extra indulgence!Experimenting with Your Cherry Muffins Recipe
Once you’re comfortable with the basic recipe, consider trying different flavor combinations. Adding a hint of almond extract or a sprinkle of cinnamon could elevate your Cherry Muffins to another level altogether. The possibilities are endless, and each batch offers an opportunity to get creative!Common Mistakes to Avoid
Overmixing the Batter
One of the most common mistakes is overmixing the batter, which can lead to tough muffins. Gently combine your ingredients until just mixed; a few lumps are fine!Not Prepping the Pan
Skipping the muffin tin preparation can lead to sticking. Always remember to grease the tin or use liners for easy removal.Ignoring Baking Time
Each oven can vary slightly, so keep an eye on your Cherry Muffins as they bake. Perform the toothpick test a few minutes before you think they might be done to avoid overbaking. Enjoy your baking journey, and watch your Cherry Muffins turn into a delicious, aromatic treat that brings joy to any occasion!
Key ingredients : Cherry Muffins
- 1 ¾ cup all-purpose flour
- 1 teaspoon baking powder
- ½ teaspoon baking soda
- ½ teaspoon salt
- ½ cup unsalted butter, softened
- 1 cup granulated sugar
- 2 large eggs
- 1 teaspoon vanilla extract
- ½ cup sour cream
- 1 ½ cup pitted and chopped fresh cherries
Preparation Time
- Prep Time: 15 minutes
- Cook Time: 22 minutes
- Total Time: 37 minutes
- Yield: 12 muffins
Cook techniques
Mixing the Batter
The key to making light and fluffy Cherry Muffins is to mix the batter without overworking it. Combine the wet and dry ingredients just until moistened to keep the muffins tender.Baking Evenly
Ensure your oven is preheated to create a consistent temperature from the start. This allows the Cherry Muffins to rise properly and develop a golden-brown crust.Cooling
Allow the muffins to cool in the pan for a few minutes before transferring them to a wire rack. This step prevents sogginess and gives your Cherry Muffins a nice texture.Serving and Presentation Ideas:
Present your Cherry Muffins on a beautiful cake stand for a delightful visual appeal. Pair them with a dollop of whipped cream or a drizzle of icing for added indulgence. These muffins are perfect for brunch gatherings or a cozy afternoon tea.People Also Ask:
What are the best cherries to use for Cherry Muffins?
Sweet cherries are the best choice for Cherry Muffins, as they provide the perfect balance of sweetness and flavor. Tart cherries can work as well but will add a tangy twist to your muffins.
Can you freeze Cherry Muffins?
Yes, you can freeze Cherry Muffins for up to three months. Just make sure to wrap them tightly in plastic wrap or store them in an airtight container to maintain freshness.
FAQ:
Can I use frozen cherries for Cherry Muffins?
Yes, frozen cherries can be used in Cherry Muffins. Just make sure to thaw and drain them to avoid excess moisture in the batter.What can I substitute for milk in Cherry Muffins?
You can use almond milk, soy milk, or even buttermilk as a substitute for regular milk in Cherry Muffins. These alternatives will still provide a moist texture.How can I make my Cherry Muffins extra moist?
To make your Cherry Muffins extra moist, consider adding a bit of yogurt or sour cream to the batter. These ingredients enhance the muffin’s tenderness and flavor.Conclusion
The Cherry Muffins Delight showcases juicy cherries and a tender crumb, making them a truly satisfying treat for any occasion. Whether it’s a weeknight dessert, a holiday breakfast, or a gathering, they are sure to impress. Preparation is incredibly simple—just mix, bake, and enjoy. The aroma of freshly baked Cherry Muffins fills your kitchen, creating an inviting atmosphere. Impress your guests or indulge in a delightful homemade experience that feels restaurant-worthy.
Cherry Muffins Delight
Ingredients
Method
- Step 1: Preheat the Oven
- Start by preheating your oven to 350 degrees F 175 degrees C This essential step ensures your Cherry Muffins cook evenly and achieve that perfect goldenbrown top While waiting for the oven to reach the desired temperature take a moment to enjoy the anticipation of the deliciousness to come
- Step 2: Prepare the Muffin Tin
- Line your muffin tin with paper liners or grease it lightly with butter or cooking spray This preparation will prevent your Cherry Muffins from sticking and make for easy cleanup later Plus those cute muffin liners will give your treats a charming touch
- Step 3: Mix the Dry Ingredients
- In a large mixing bowl whisk together the flour baking powder salt and sugar These dry ingredients are the backbone of your muffins Mixing them well ensures an even distribution of flavors and helps your Cherry Muffins rise beautifully Enjoy the sweet earthy aroma of the flour as you sift it through your fingers
- Step 4: Combine the Wet Ingredients
- In another bowl crack the eggs and whisk them until smooth Then add the milk and melted butter These ingredients bring moisture and richness to the batter Stir until fully incorporated and feel the excitement as the mixture transforms into a creamy blend
- Step 5: Combine Wet and Dry Mixtures
- Gently pour the wet mixture into the dry ingredients Stir the batter just until the flour is moistened be careful not to overmix Some lumps are perfectly fine this is what keeps your Cherry Muffins fluffy and tender Its amazing how a few simple ingredients come together to create something so delightful
- Step 6: Fold in the Cherries
- Now comes the star of the show Gently fold in the chopped cherries taking care to distribute them evenly throughout the batter Their juicy sweetness will burst with every bite of your Cherry Muffins bringing a pop of flavor that will have everyone reaching for seconds
- Step 7: Fill the Muffin Cups
- Spoon the batter into the prepared muffin cups filling each about twothirds full This allows enough room for your muffins to rise without overflowing Youre just moments away from enjoying your freshly baked Cherry Muffins so take a moment to admire your handiwork
- Step 8: Bake to Perfection
- Slide the muffin tin into the preheated oven and let them bake for about 2025 minutes Youll know theyre done when the tops are golden brown and a toothpick inserted in the center comes out clean The aroma wafting through your kitchen is going to be irresistible
- Step 9: Cool and Enjoy
- Once baked carefully remove the muffin tin from the oven Allow the muffins to cool in the tin for a few minutes before transferring them to a wire rack This step is crucial for keeping them from becoming soggy Enjoy the anticipation of tasting your creation as they cool
Notes
Tip on Storage
- Store your delicious Cherry Muffins in an airtight container at room temperature for up to three days. They remain soft and tasty during this time, allowing you to indulge whenever you wish!
Freezing Suggestions
- If you want to save some for later, wrap the cooled muffins individually in plastic wrap and place them in a freezer bag. They can be frozen for up to three months. Just thaw them at room temperature when you’re ready to enjoy a muffin!
Fresh Cherry Alternatives
- Don’t have fresh cherries? No problem! You can substitute with frozen cherries—just make sure to thaw and drain them before folding them into the batter. Your Cherry Muffins will still be a hit!