
Every recipe on FoodNearMe is tested to be anti-inflammatory, satisfying, and actually delicious — real food, real results, no shortcuts.
More about Joe →Introduction
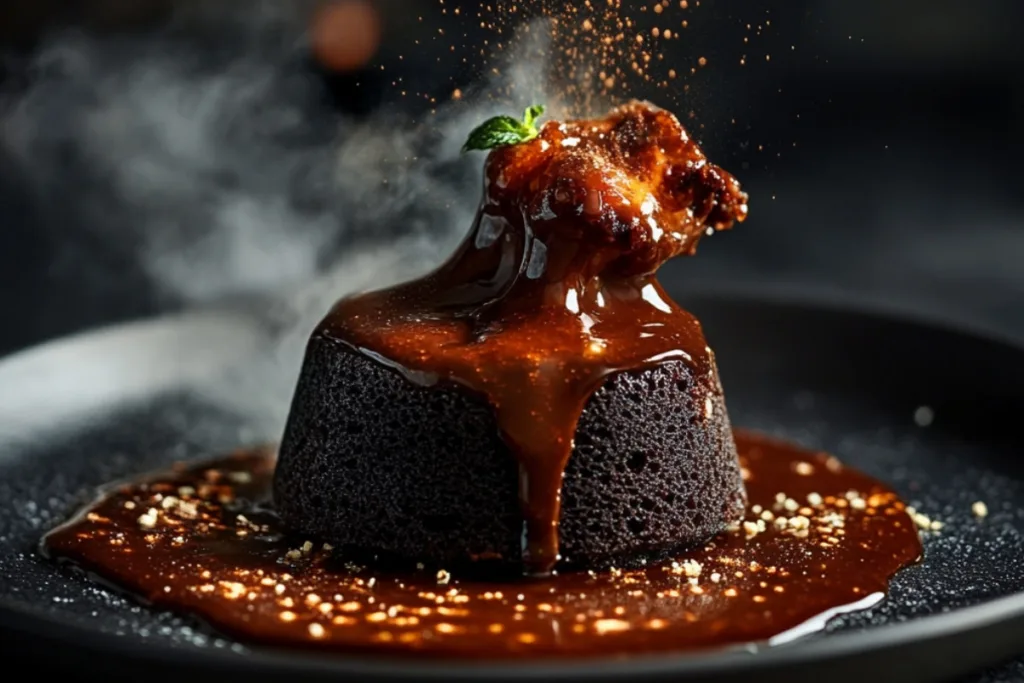
Life can be a whirlwind of responsibilities, and sometimes we forget to treat ourselves. Imagine coming home after a long day, seeking a moment of comfort, and indulging in an Indulgent Decadent Molten Lava Cake Explosion that erupts with warm chocolatey goodness. This delightful treat isn’t just a dessert; it’s a small slice of joy you can create in your kitchen, giving you the chance to savor the sweeter moments in life, even when days feel overwhelming.
With just a few simple ingredients, you can whip up a personal Molten Lava Cake in no time. Picture the rich chocolate core flowing out as you take that first heavenly bite. It’s not just about satisfying your sweet tooth; this recipe can bring warmth and cheer into your home, making it perfect for cozy nights in or a quick pick-me-up. Let’s dive into this easy recipe that can transform any day into something extraordinary.
Why we love this recipe
Have you ever craved a dessert that balances simplicity with indulgence? The Molten Lava Cake fits the bill perfectly. The outer cake layer is wonderfully soft and light, while the center offers a luscious, gooey chocolate surprise that leaves you wanting more. It’s like having two desserts in one! This treat is quick to whip up, making it a fantastic option for busy days when you need a sweet escape.
One of the best things about this Molten Lava Cake is that it requires minimal ingredients and effort, so you can focus on what really matters: enjoying a delightful dessert without the hassle. This recipe is fantastic for anyone who might be new to baking, as it allows for a creative experience that results in a show-stopping dessert every time. Plus, who doesn’t love a dessert that bakes up in just minutes and tastes as if it’s straight from a fancy restaurant?

Step-by-Step Cooking Instructions
Now that you’ve gathered all your ingredients and tools, it’s time to transform these simple components into a deliciously rich Molten Lava Cake. Follow these steps carefully, as each one is designed to help you create a dessert that oozes with chocolatey goodness and impresses your friends and family.
Step 1: Preheat the Oven
Begin by preheating your oven to 425°F (220°C). This initial step is crucial, as a properly heated oven ensures that your cake rises perfectly. Take a moment to enjoy the warmth of the kitchen as the oven begins to hum with energy.
Step 2: Prepare Your Ramekin
Grab a small ramekin and give it a good coating with non-stick spray. This ensures that when the moment comes to serve your Molten Lava Cake, it slides out effortlessly. Sprinkle a dusting of cocoa powder inside the ramekin, tapping out the excess. This simple preemptive move will add a little extra chocolate flavor.
Step 3: Melt the Chocolate and Butter
In a microwave-safe bowl, combine your chopped chocolate and butter. Microwave in short bursts of 20 seconds, stirring in between, until the mixture is smooth and glossy. The aroma will be divine! This melting process is a magical moment where your ingredients start to come together.
Step 4: Whisk in Sugar and Eggs
Once your chocolate and butter are fully melted, add in the granulated sugar. Whisk vigorously to combine until the mixture is smooth and shiny. Next, crack in the egg and egg yolk. Continue whisking until everything is blended, creating a luscious base for your Molten Lava Cake.
Step 5: Incorporate Flour
Now it’s time to introduce the flour. Gently fold it into your chocolate mixture using a spatula. Be careful not to overmix; just combine until you see no dry flour. This step forms the foundation of your cake, balancing the oozing center with a delicate crust.
Step 6: Pour and Bake
Pour the batter into the prepared ramekin, filling it about three-quarters of the way. Place it in your preheated oven and set a timer for 12-14 minutes. The anticipation will build as the aroma fills your kitchen. You’ll know they’re ready when the edges are firm but the center remains soft.
Step 7: Cool and Serve
Once baked, carefully remove the ramekin from the oven and allow it to cool for about 1 minute. Then, place a plate over the top of the ramekin, flip it upside down, and gently lift the ramekin away. As you remove it, behold the beautifully formed Molten Lava Cake just waiting to be devoured. Enjoy it warm, perhaps with a scoop of vanilla ice cream for an extra treat!
Detailed Directions and Instructions
Step 1: Preheat the Oven
Setting your oven to the right temperature allows your cake to bake evenly, resulting in that perfect molten center everyone loves.
Step 2: Prepare Your Ramekin
The non-stick spray and cocoa powder will ensure your cake doesn’t get stuck, which could ruin its beautiful presentation.
Step 3: Melt the Chocolate and Butter
Microwaving is a quick method to melt chocolate; just be cautious not to scorch it. Smooth, melted chocolate is the soul of your dessert.
Step 4: Whisk in Sugar and Eggs
Whisking helps to incorporate air, which provides lift to your Molten Lava Cake, creating a delightful lightness in contrast to its rich interior.
Step 5: Incorporate Flour
Fold gently to maintain the structure. Overmixing could lead to a denser cake than desired.
Step 6: Pour and Bake
Timing is key! Keep an eye on your Molten Lava Cake as it bakes, as each oven may vary slightly.
Step 7: Cool and Serve
This is the moment you’ve been waiting for! The anticipation will build as you reveal the inner chocolate magic.
Notes
Customize Your Creation
Feel free to add a splash of vanilla extract or a sprinkle of espresso powder for a flavor twist. This Molten Lava Cake is a canvas for your creativity!
Storage Tips
If you have any leftovers—though unlikely!—store them in the refrigerator. Reheat in the microwave for a few seconds before serving to refresh that gooey center.
Serving Suggestions
Enhance the experience by serving with berries, whipped cream, or ice cream. These add delightful contrasts to the warm, rich cake.
Tips for Making the Perfect Molten Lava Cake
Variations on the Classic Molten Lava Cake
You can experiment with different chocolates, such as dark, milk, or even white chocolate, each bringing a unique profile to your dessert.
Using Different Bakeware
While ramekins are traditional, you can also use muffin tins for smaller servings or silicone molds for fun shapes; just be mindful of the baking time.
Common Mistakes to Avoid
One common mistake when making a Molten Lava Cake is overbaking. Always trust your instincts about baking time—if you’re unsure, slightly underbake for that melty center.
Another pitfall is not allowing enough time for cooling before serving, which can lead to a cake that won’t hold its shape. Remember, patience is key!

Key ingredients
- 1 oz. semi-sweet chocolate
- 2 tbsp unsalted butter
- 1 egg
- 2 tbsp sugar
- 3 tbsp all-purpose flour
- 1/4 tsp vanilla extract
- Pinch of salt
Preparation Time
- Prep Time: 10 minutes
- Cook Time: 12 minutes
- Total Time: 22 minutes
- Yield: 1 serving
Cook techniques
Preparation of Ingredients
Before you start making the Molten Lava Cake, ensure all ingredients are measured and ready. This helps streamline the cooking process and avoid any mishaps.
Melting Chocolate
Gently melt chocolate using a double boiler or microwave. If using a microwave, do so in short bursts to prevent burning. Perfectly melted chocolate forms the base of your Molten Lava Cake.
Whipping Eggs
Whipping eggs until they are pale and fluffy is key. This introduces air into the mixture, helping achieve that perfect rise and airy texture in the Molten Lava Cake.
Filling the Ramekins
When pouring the batter into ramekins, ensure not to overfill them. Leave enough space for the cake to rise while maintaining that gooey center characteristic of a Molten Lava Cake.
Baking to Perfection
Bake your Molten Lava Cake for the recommended time. Keep an eye on them to ensure you don’t overbake, as the center should remain molten and soft.
Serving and Presentation Ideas:
For a delightful presentation, dust the top of the Molten Lava Cake with powdered sugar. Serve it warm with a scoop of vanilla ice cream or a dollop of whipped cream on the side. Consider garnishing with fresh berries for an added splash of color. Pairing with a rich espresso or a fruity dessert wine can enhance the overall tasting experience.
People Also Ask:
What are some common variations for Molten Lava Cake? You can experiment with different types of chocolate, such as dark or white chocolate. Adding a flavor extract, like raspberry or orange, can also provide a unique twist to traditional Molten Lava Cake.
Can you make Molten Lava Cake ahead of time? Yes, you can prepare the batter ahead and store it in ramekins in the fridge. Bake just before serving to ensure a warm, gooey center in your Molten Lava Cake.
What can I use instead of ramekins? If you do not have ramekins, you can use any oven-safe muffin tins or cups. Just ensure to adjust the baking time as needed for your Molten Lava Cake.
FAQ
Can I substitute ingredients in Molten Lava Cake?
Yes, you can substitute butter with coconut oil or use different kinds of chocolate to achieve various flavors in your Molten Lava Cake.
Is it necessary to use high-quality chocolate for Molten Lava Cake?
Using high-quality chocolate can enhance the flavor of your Molten Lava Cake, leading to a richer and more decadent treat.
How can I prevent my Molten Lava Cake from sticking to the ramekins?
Greasing the ramekins with butter or using non-stick spray can help prevent sticking. You may also dust them lightly with cocoa powder after greasing.
Conclusion
Creating a delightful Molten Lava Cake at home is a fulfilling experience that can bring joy to any occasion. The combination of warm, gooey chocolate and a perfectly baked exterior is always a winner. As you savor this delicious treat, take the time to reflect on how this simple recipe can spark happiness among family and friends. Have you tried any unique variations of Molten Lava Cake? Share your thoughts and experiences with us!


Indulgent Decadent Molten Lava Cake Explosion
Ingredients
Method
- Step 1: Preheat the Oven
- Begin your baking adventure by preheating your oven to 350°F (175°C). This crucial step ensures that your Coffee Walnut Cake bakes evenly and rises beautifully. As the oven warms up, take a moment to appreciate the aroma of coffee wafting through your kitchen, setting the stage for your delightful baking experience.
- Step 2: Prepare Your Baking Pan
- Grab a loaf pan and grease it generously with butter or line it with parchment paper. This step is essential as it prevents the batter from sticking to the pan, allowing your Coffee Walnut Cake to slip out effortlessly once it’s baked. Feel free to tap the pan lightly to ensure you have coated every nook and cranny.
- Step 3: Mix the Wet Ingredients
- In a mixing bowl, combine the softened butter and sugar, whisking them together until they turn light and fluffy. This process incorporates air into the batter, making your cake tender. Gradually add in the eggs and coffee, mixing well. The combination of these ingredients not only enriches the flavor but also transforms the texture, making it irresistibly moist.
- Step 4: Combine the Dry Ingredients
- In a separate bowl, whisk together the flour, baking powder, and salt. Mixing dry ingredients ensures even distribution of the leavening agent, which will give your Coffee Walnut Cake a perfect rise. The simple act of whisking creates a sense of anticipation as you prepare for the magic that awaits!
- Step 5: Bring It All Together
- Slowly fold the dry mixture into the wet ingredients. Be gentle here; you want to combine them without overmixing, which can lead to a dense cake. As you fold, envision the delightful blend of coffee and walnut flavors melding together in harmony. Once you see the flour disappear, you’re almost there!
- Step 6: Add the Walnuts
- Chop your walnuts into small pieces and fold them into the batter. Their rich, nutty flavor and pleasant crunch will add a delightful texture to your Coffee Walnut Cake. This step not only enhances the flavor profile but makes every bite more satisfying!
- Step 7: Pour and Level the Batter
- Transfer your batter into the prepared loaf pan, smoothing the top with a spatula. This is where your cake begins to take shape, and the excitement builds! Leveling the batter ensures an even bake and provides a gorgeous, uniform cake once it comes out of the oven.
- Step 8: Bake to Perfection
- Place your loaf pan in the preheated oven and bake for 50-60 minutes. The aroma of coffee will fill your home as it bakes, enveloping you in a cozy embrace. You’ll know your Coffee Walnut Cake is done when a toothpick inserted into the center comes out clean. Resist the urge to open the oven door too early, as sudden temperature changes can affect your cake’s rise.
- Step 9: Cool and Serve
- Once baked, remove the cake from the oven and let it cool in the pan for about 10 minutes before transferring it to a wire rack. This resting period allows your Coffee Walnut Cake to set and enhances its flavor as it cools. Patience is key! Once adequately cooled, slice and serve with your favorite spread or enjoy it plain.