Full nutrition details in the recipe card below ↓

Every recipe on FoodNearMe is tested to be anti-inflammatory, satisfying, and actually delicious — real food, real results, no shortcuts.
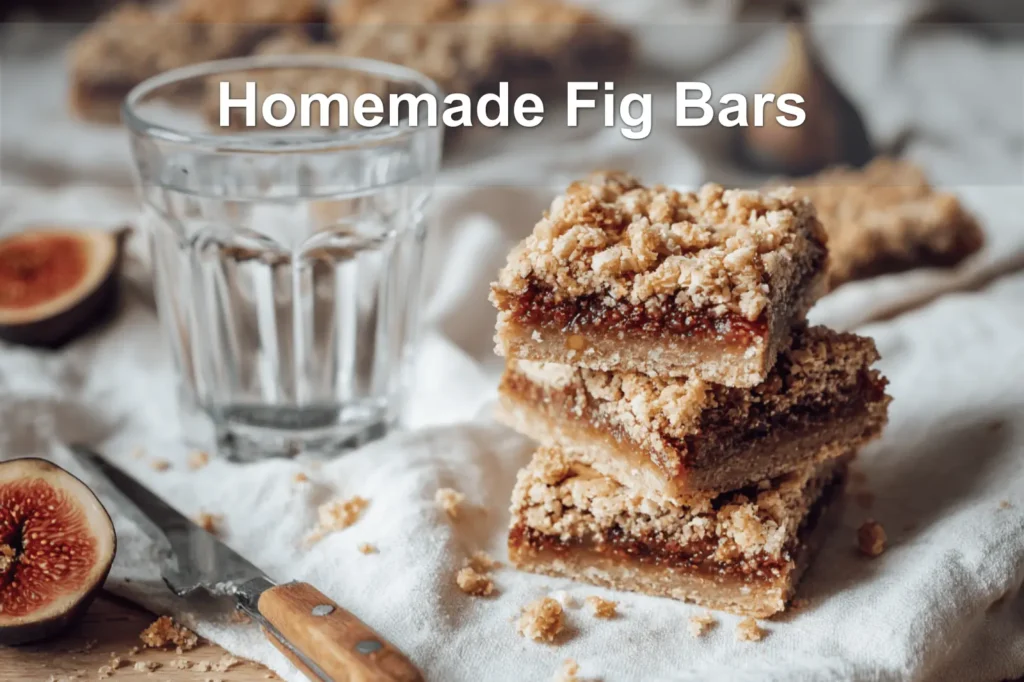
More about Joe →Every time I bite into a homemade fig bar, I’m back in grandma’s kitchenapron flour-dusted, sweet fall light in the window. These figgy favorites are trending again (oh hi, TikTok and Pinterest), in a big cozy comeback. They’re beginner-friendly, 30 minutes from start to chewy little snack heaven.
This easy recipe brings together dried figs, orange zest, and just-right oat crumble for a treat that lives somewhere between cookie and soft-baked granola bar. It’s pantry-handy, not fussy. A little sweet, a little nutty. Full details in the blog!
I grew up watching fig jam bubble away on the stoveand yeah, that scent sticks with you. Testing this recipe took a few rounds, but I landed on a buttery crust that actually holds. I tested it. You’ll love the secret spice in the filling!
Why You’ll Love These Homemade Fig Bars
These Homemade Fig Bars are pure nostalgia wrapped in chewy, golden goodness. Here’s why they’ll win you over:
- Simple ingredients: Everything you need is pantry-friendly and easy to find at your local grocery store.
- Customizable: Whether you’re swapping a filling or adjusting the crust, these bars are pretty forgiving.
- Jam-packed flavor: Fresh figs and a buttery oatmeal crust create a cozy, snack-worthy treat.
- Make-ahead friendly: Perfect for batch baking, so you’ve always got a homemade treat on hand.
Breaking Down the Ingredients
Each ingredient in this recipe was chosen for both flavor and function. Let’s break it down:

- Fresh figs: The star of this recipe! Sweet, jammy, and a little earthy. Ensure they’re ripe for maximum flavor.
- Brown sugar: Adds a hint of caramel sweetness to both the filling and crust, balancing the natural fig tartness.
- Lemon zest: A secret weapon for brightness in the filling.
- Oats: Rolled oats create a chewy, rustic texture in the crustno quick oats here!
- Melted butter: The key to a buttery, cohesive crust and crumble topping.
Pro Tip: Got extra figs? Toss them into a salad or serve alongside cheese for a no-waste snack!
| Ingredient | Amount | Substitutions |
|---|---|---|
| Fresh figs | 720g (24 small-medium figs) | Store-bought fig jam |
| Brown sugar | 1 1/3 cup (divided) | Coconut sugar |
| Butter | 1 cup (melted) | Coconut oil (mild flavor) |
Step-by-Step: How to Make Homemade Fig Bars
This recipe is beginner-friendly, so don’t worry if it’s your first time making a homemade pastry-like treat. Here’s how it works:
- Prepare the filling: Combine figs, brown sugar, lemon zest, salt, and vanilla in a saucepan. Cook until soft and jammy (about 45 mins). Allow it to cool. Want it smoother? Puree it!
- Make the crust: Mix melted butter, flour, oats, brown sugar, salt, and baking powder. It’s thickdon’t be afraid to use your hands!
- Assemble: Press most of the crust into a lined 9×13-inch pan. Spread the fig filling over it, then crumble the remaining crust on top.
- Bake: Into a preheated oven (350°F) it goes for 30–35 minutes, until golden and bubbly.
The hardest part? Letting them cool completely before slicing. They firm up beautifully but need patience!
Quick Timing Guide
| Step | Time |
|---|---|
| Filling (stovetop) | 45 minutes |
| Crust prep | 10 minutes |
| Baking | 30–35 minutes |
Serving and Storing Your Fig Bars
Once cooled and sliced, these bars are ready to star at any family gatheringor just alongside a cup of tea on a weekday afternoon. They need very little fuss!
Storage Tips:
- Room temperature: Store in an airtight container for up to 3 days.
- Refrigerator: Keeps fresh for 5 days. Give them a few minutes at room temp before serving if chilled.
- Freezer: Freeze in layers of parchment paper for up to 3 months, then thaw overnight in the fridge.
| Storage Method | Time | Tips |
|---|---|---|
| Room Temperature | 3 Days | Use an airtight container to keep them chewy. |
| Refrigerator | 5 Days | Bring to room temp before serving! |
| Freezer | 3 Months | Freeze in a single layer to prevent sticking. |
Expert Insight: The Appeal of Homemade Fig Bars
Homemade fig bars shine because they balance natural sweetness with a wholesome texture, thanks to the fibrous fruit filling. Crafting them yourself allows control over sugar content and ingredient quality, making these treats both satisfying and nutritionally thoughtfulqualities often missing in store-bought versions.
For more delicious recipes and cooking inspiration, follow me on Facebook, Pinterest and Reddit!
The Journey to Perfect Homemade Fig Bars
These homemade fig bars took several rounds to get right. Early attempts were too crumbly or overly sweet, but with each bake, I learned how to balance the filling and dough just right. Today’s recipe reflects all that trial and error, delivering soft bars with rich fig flavor that’s both comforting and wholesome.
FAQs ( Homemade Fig Bar )
How long do homemade fig bars last?
Homemade fig bars will stay fresh for up to 1 week when stored in an airtight container at room temperature. For longer storage, you can freeze them for up to 3 months wrapped tightly in plastic wrap. These bars actually taste better after a day or two as the flavors meld together. Keep them away from direct sunlight and moisture to maintain their soft, chewy texture.
Can I use fresh figs instead of dried figs for fig bars?
Yes, you can use fresh figs, but you’ll need to cook them down first to remove excess moisture. Chop about 2 cups of fresh figs and simmer them with a little sugar and lemon juice until they form a thick paste. Fresh figs work wonderfully in fig recipes and create an even more intense flavor. Just make sure the mixture is thick enough so your bars don’t become soggy during baking.
What makes homemade fig bars better than store-bought?
Homemade fig bars contain no artificial preservatives and you control every ingredient that goes into them. The pastry is typically more tender and flaky than commercial versions, and you can adjust the sweetness to your taste. You’ll also get more real fig flavor since store-bought versions often contain fillers and artificial flavors. Plus, making them at home costs significantly less than buying premium fig bars from the store.
Can I make fig bars gluten-free?
Absolutely! Simply substitute the all-purpose flour with your favorite gluten-free flour blend in a 1:1 ratio. Almond flour or a combination of rice flour and tapioca starch works particularly well for fig bars. You might need to add a pinch of xanthan gum if your flour blend doesn’t already contain it. The texture will be slightly different but just as delicious as traditional fig bars.
What other fig recipes can I make with leftover fig filling?
Leftover fig filling is perfect for making a rustic fig cake, spreading on toast, or swirling into yogurt or oatmeal. You can also use it as a filling for thumbprint cookies or layer it in a trifle dessert. The sweet, jammy texture makes it incredibly versatile for both breakfast and dessert applications. Store any extra filling in the refrigerator for up to 2 weeks and use it whenever you want to add natural fig sweetness to your meals.

Wrapping Up Your Homemade Fig Bars Adventure
Your homemade fig bars come together in about an hour, but deliver days of cozy snack bliss. That golden oat crust and jammy fig filling? Pure comfort with a touch of sweet nostalgiayou’ll wanna make these again and again.
Try adding chopped nuts to the filling or a sprinkle of cinnamon for a little extra warmth. Store bars in an airtight container or pop leftovers in the fridge for easy access during busy daysa tip from a pro kitchen I trust. These bars are as flexible as they are delicious.
Got a favorite fig recipe or a fun twist on this one? I’d love to see your photos and hear your stories. Pass these bars around to your circleit’s the kind of baking that sparks connection and memories. Happy baking, friends!

Homemade Fig Bars: Delicious Easy Recipe You Need
Ingredients
Method
- Make the fresh fig filling by combining figs, brown sugar, lemon zest, salt, and vanilla extract in a medium heavy-bottom saucepan.
- Heat over medium heat until the figs release their juices and the mixture comes to a slow boil.
- Reduce heat and simmer for 45 minutes, stirring occasionally and mashing larger pieces with the back of a wooden spoon.
- Remove from heat and cool; puree with an immersion blender or food processor for a smoother texture if desired.
- Preheat the oven to 350 °F (175 °C).
- Line a 9×13-inch pan with aluminum foil extending over the sides and spray with cooking spray.
- In a large microwave-safe bowl, melt the butter.
- Add flour, rolled oats, brown sugar, salt, baking powder, and vanilla extract to the melted butter and stir until fully combined with no streaks of flour.
- Set aside 1 1/2 cups of the oat mixture.
- Press the remaining mixture evenly into the bottom of the prepared pan using the bottom of a glass to form a solid layer.
- Spread the fig jam evenly over the crust layer.
- Crumble the reserved oat mixture over the jam layer.
- Bake for 30-35 minutes or until the jam is bubbling and the top is golden brown.
- Remove from oven and allow to cool completely.
- Use the foil to lift the bars out of the pan and slice into 16 bars before serving.
Notes
- Use old-fashioned rolled oats, not instant or quick oats, for the best crust texture. Store-bought fig jam can be used as a substitute. Homemade fig bars can be stored at room temperature for up to 3 days, refrigerated for 5 days, or frozen for 3 months.